
On the ATH-M50/M50x, the earcup is stopped from over-rotating by one tiny plastic tab on the hinge. That tab is the single point of failure — it snaps, and the cup flops backwards. A new headband is ~$25; two printed parts fix it for free.
I printed both fixes and used them together: the small tab underneath, the screw-on bracket over it. No glue — the bracket holds the tab in place.
Parts
1. Bracket + backing plate — Pinshape 47023 by MichaelJWms (CC0)
One STL (ATH-M50X_Hinge_Repair_V2.6.stl) contains two pieces: the L-shaped brace (38 × 11.5 × 12.5 mm) and a 2 mm flat plate. They sandwich the end of the headband arm under the hinge barrels and are held by two small self-tapping screws. Purely mechanical — it takes the load the broken tab used to take.
- PLA, PETG or ABS
- Layer height under 0.15 mm (0.0875 mm is best)
- 30% infill
2. Replacement tab — Printables 824299 by NotARealDragon
A tiny plate with a stop tab on it (ATH-M50x_hinge.3mf.stl, 15.4 × 8.8 × 4.6 mm), designed to be glued where the original tab broke off. Restores the stop in its original position. I didn’t glue mine — see below.
- PLA, 0.10 mm layer height, 100% rectilinear infill
Why both
Part 2 alone puts the whole load on a glue joint — it will let go eventually. Part 1 alone stops the cup but sits outside the hinge. Stacked, the small tab does the stopping in the right place and the bracket clamps down over it and carries the force.
Which is why I skipped the glue entirely. Once the bracket is screwed down over the tab, it’s trapped — there’s nowhere for it to go, and the screws carry the load anyway. I just set it in place dry. Nothing to cure, no 24-hour wait, and the whole thing comes back apart if you want to adjust it.
Steps
- Print both. Print part 2 fine and solid — it’s a load-bearing few millimetres.
- Sit part 2 where the original tab broke off, flat side down. Dry — hold it there for the next step.
- Put the flat 2 mm plate on the underside of the headband arm, the brace on top over the tab, and screw the two together through the arm. Snug, not crushed — over-torquing splits PLA. Tightening the screws is what pins the tab.
- Fold and rotate the cup a few times to check clearance. Nothing to wait for — it’s done.
Installed
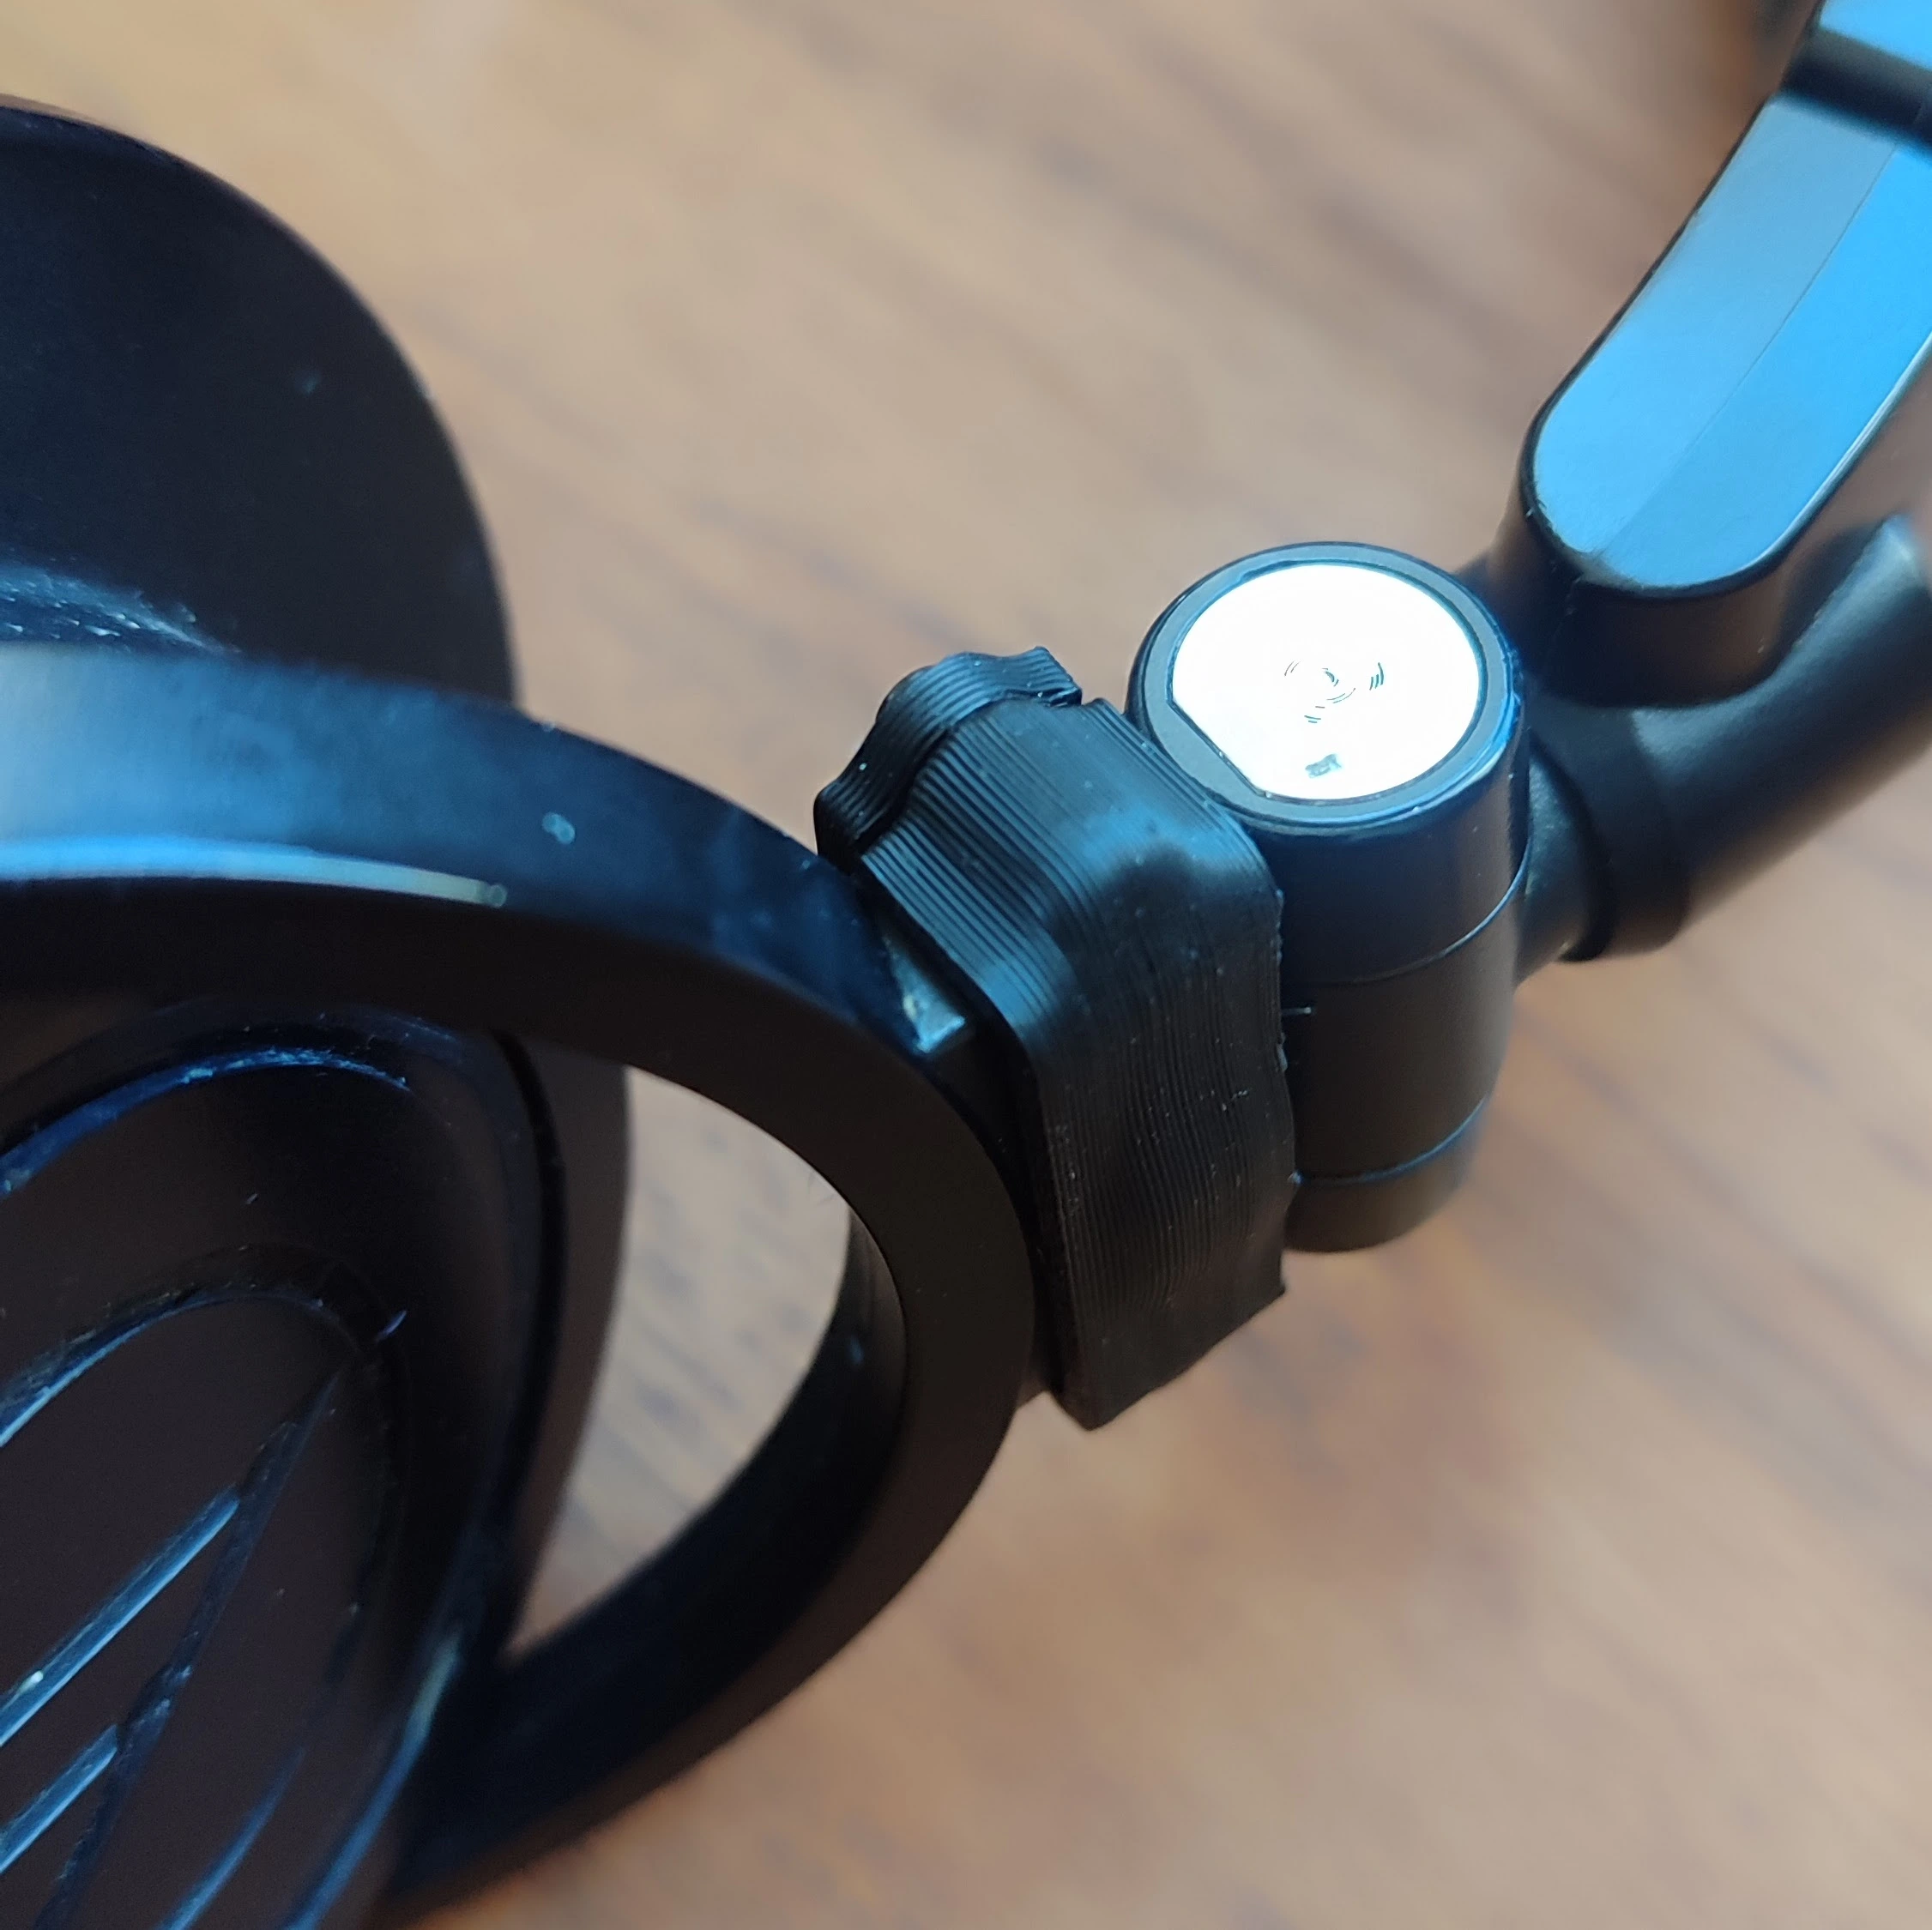
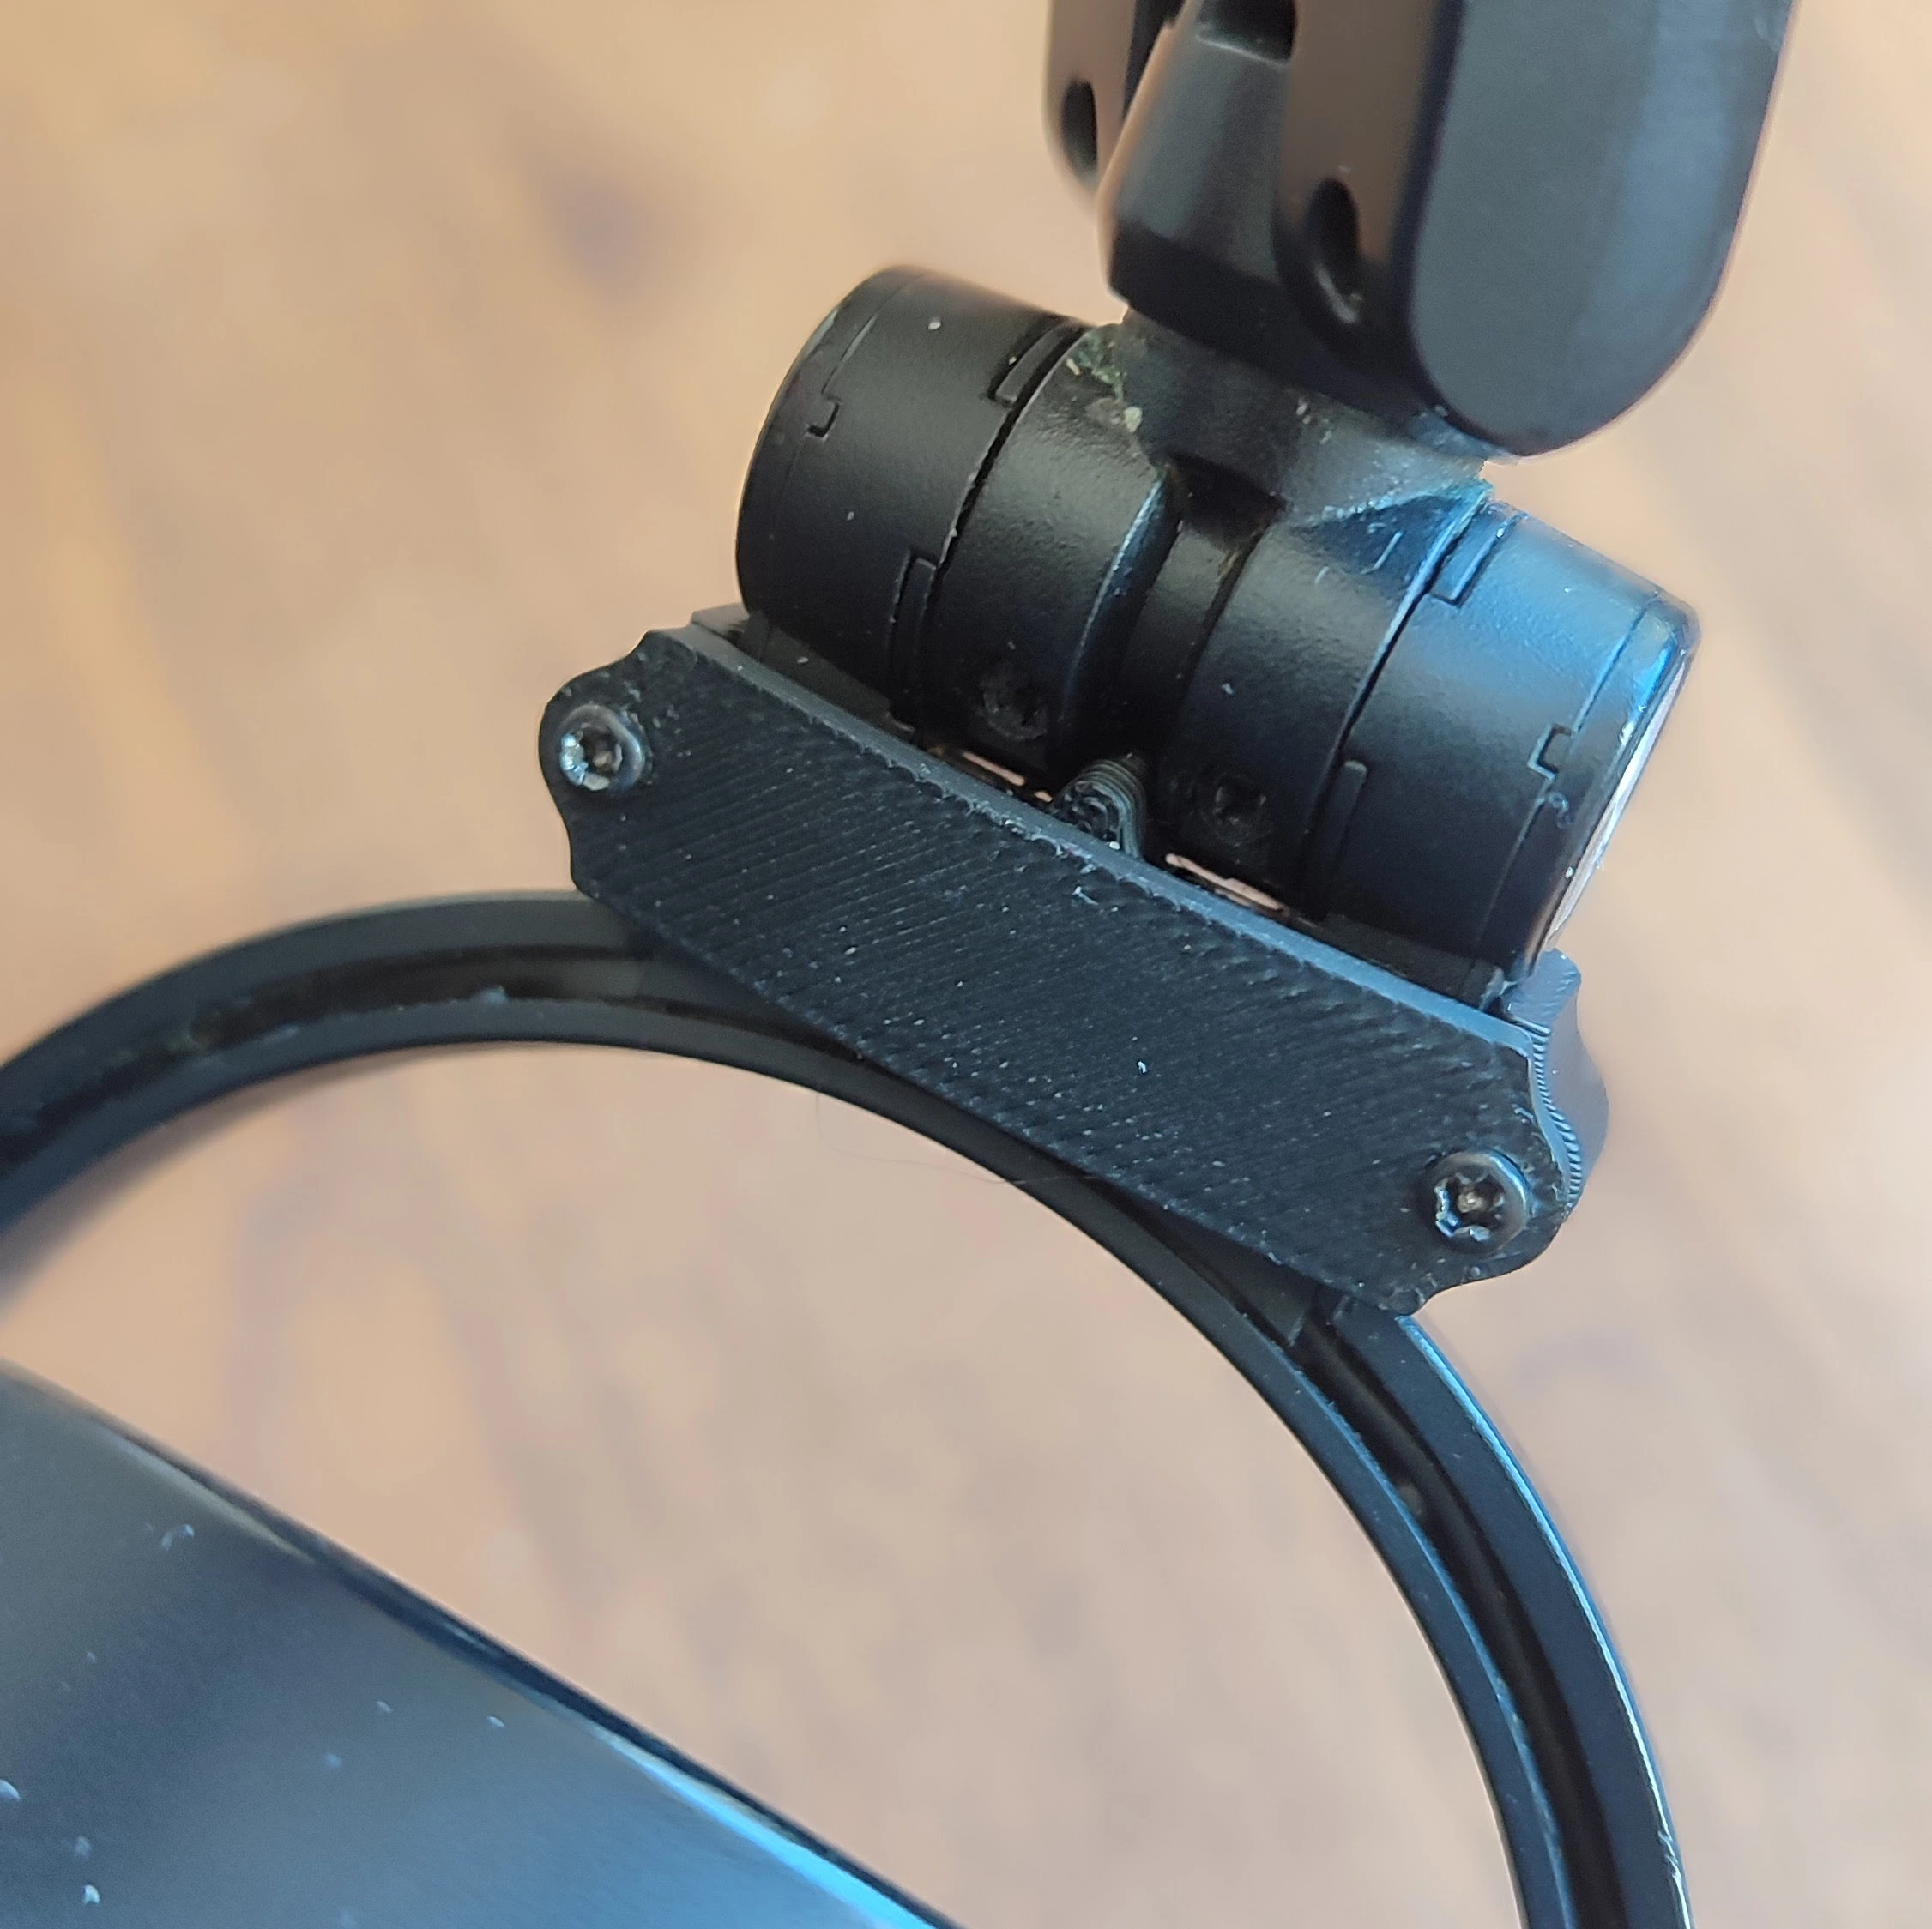
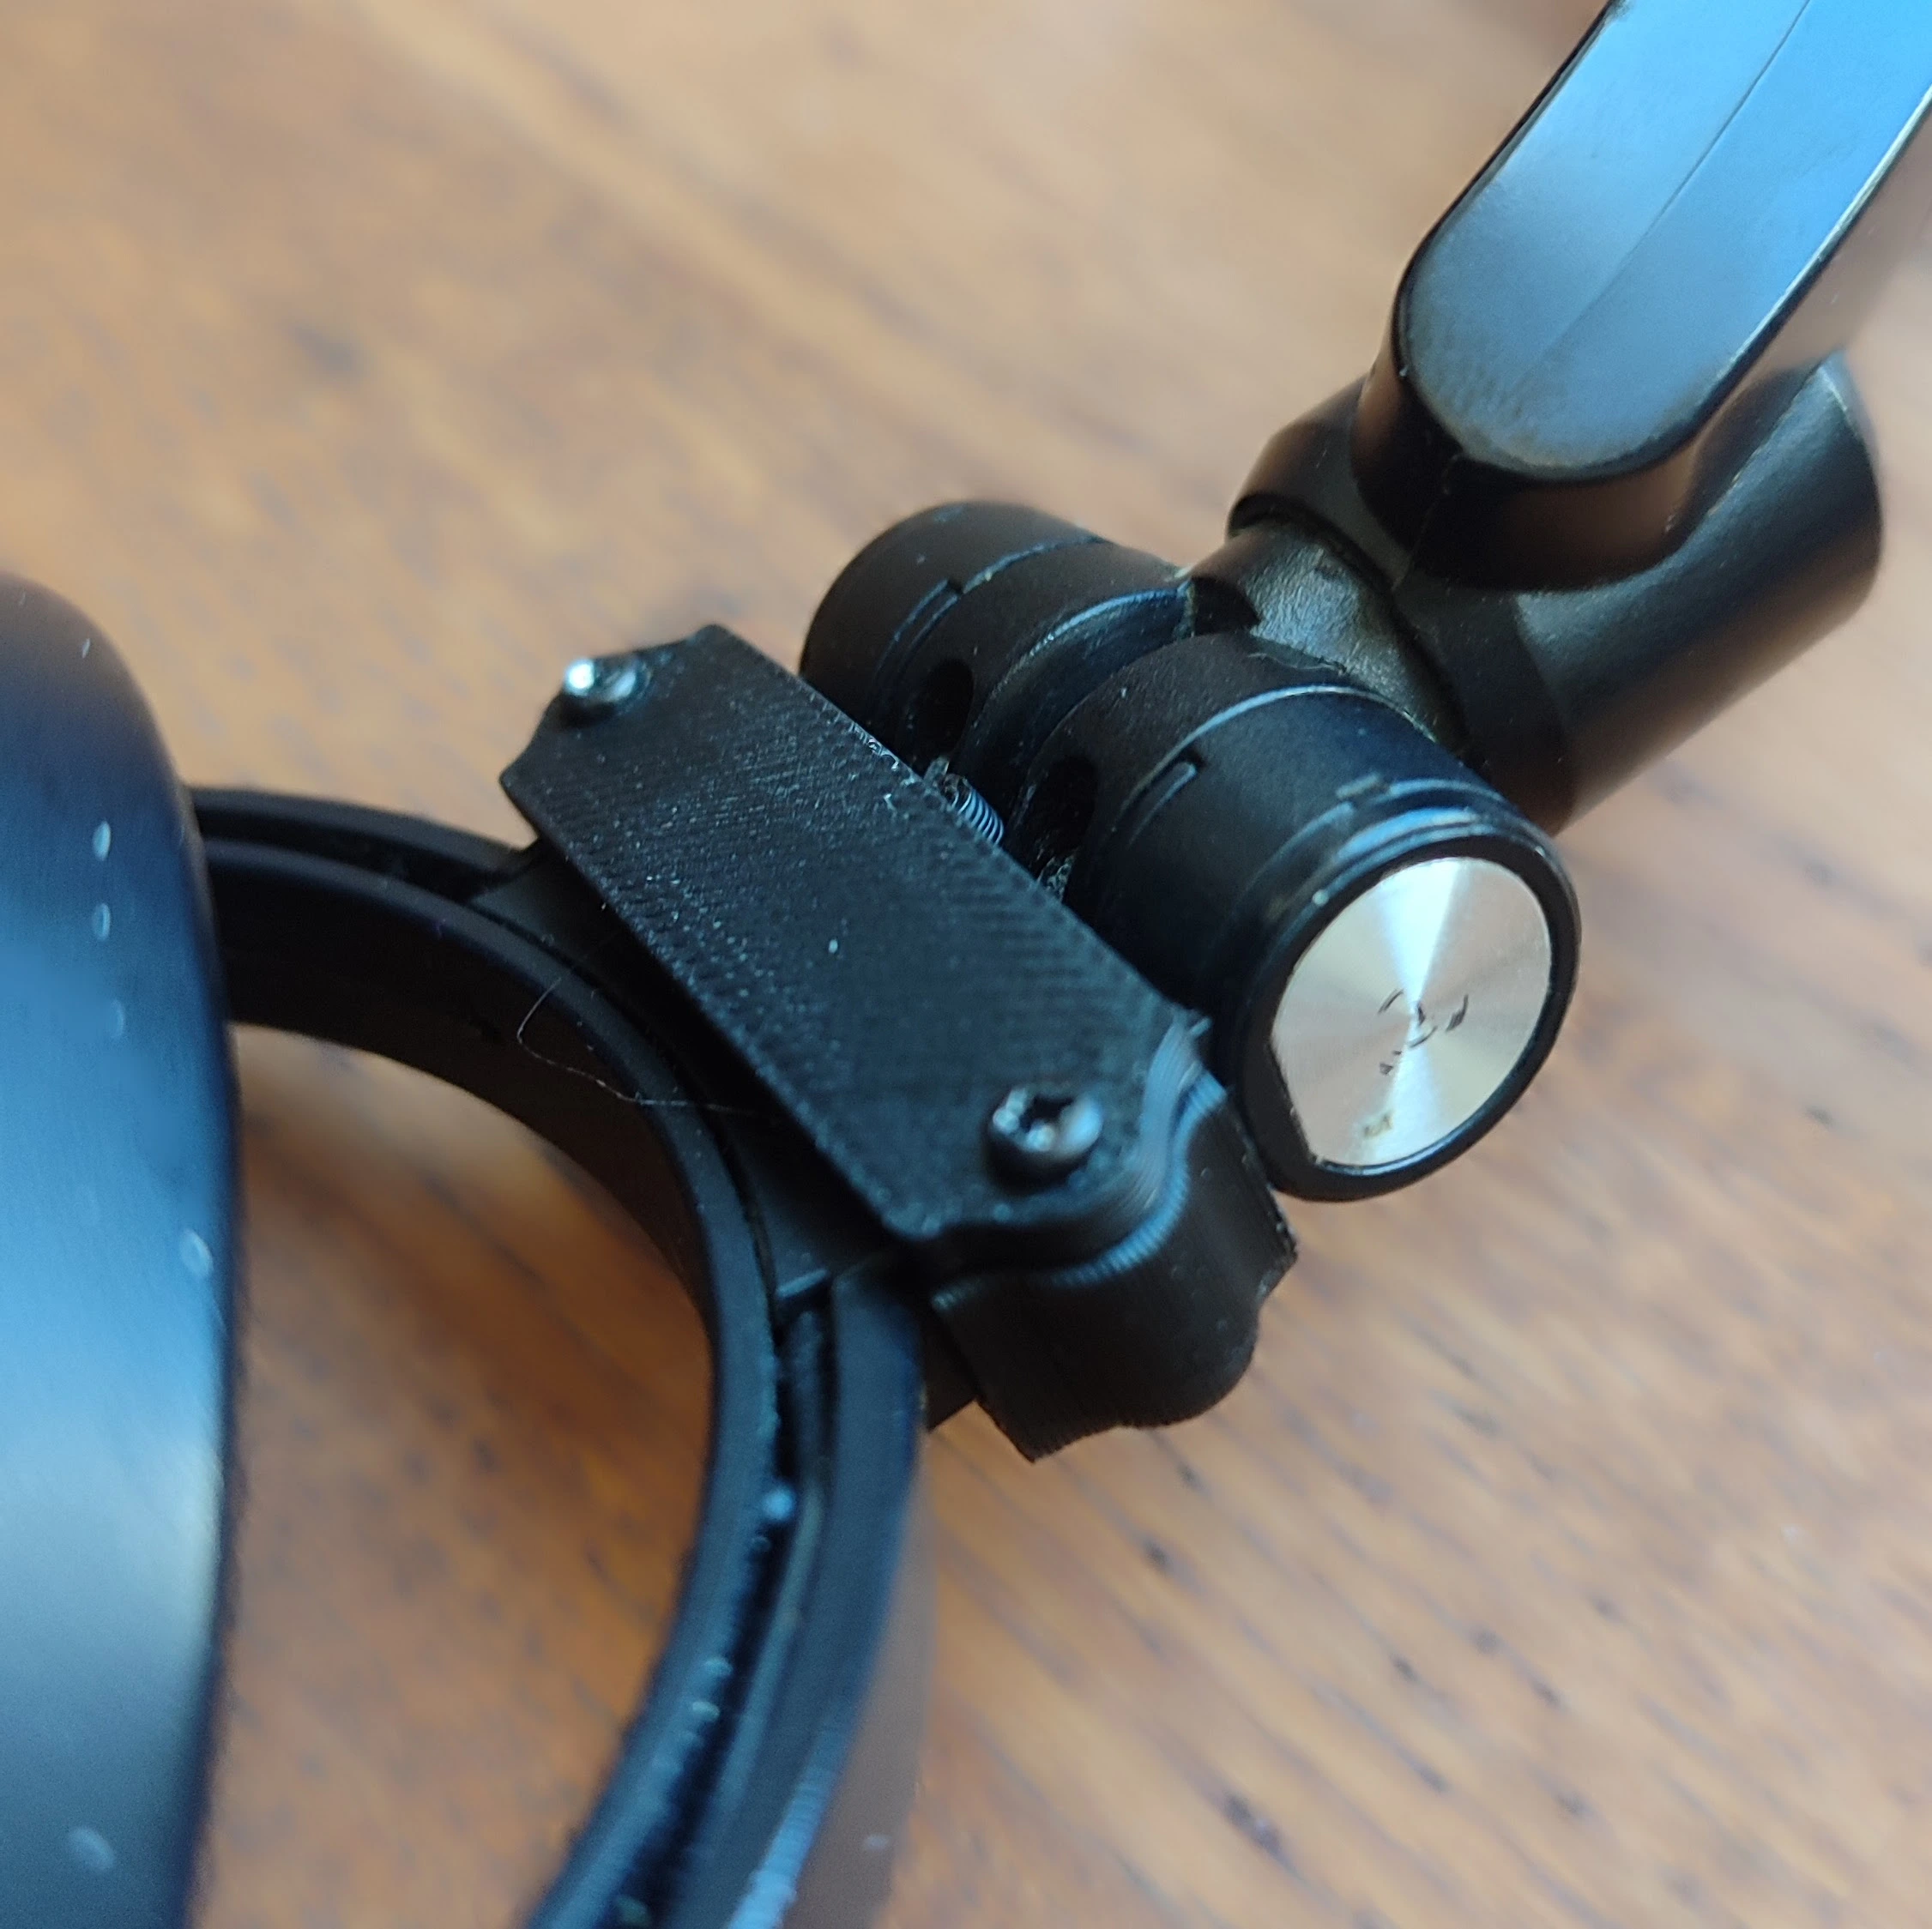
The tab sits underneath, hidden by the brace.
Notes
- Folding is stiffer than stock. The rotation stop is more rigid than the original tab, so the cups don’t collapse as neatly — a fair trade for headphones that stay on your head.
- Both fixes are worth doing on the good side too, before it breaks.